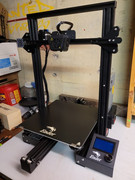
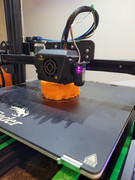
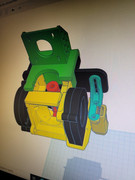
i started with a stock ender 3 max - they have since come out with the neo version that already has many of the upgrades i had to do myself -
Creality Ender 3 Max Neo - https://amzn.to/3SqN5Ze
ill list all upgrades and links to where to buy as well as all STL files used in this build.
here it is new unbuilt and all together
Capricorn Bowden PTFE Tubing 1M -https://amzn.to/3U5Ce8m
that cutter is worth every cent!. when you use side cutters it compresses the tube and will cause issues!

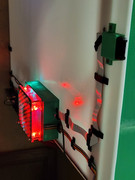
added a camera for remote viewing of my prints . both over wifi and wile out in the world - at one point early on i used it as a timelapse camera as well
WYZE Cam v3 with Color Night Vision - https://amzn.to/4b4EWkD


then i needed auto bed level. and i had to make my own mount because the factory one just didnt work
CR Touch Auto Leveling Kit - https://amzn.to/48FWkdR
3D Printer Heat Bed Leveling Parts,Silicone (a MUST!) https://amzn.to/3vKrbaA
GXS CR touch mount bracket (v3) for ender 3 max STL - https://www.printables.com/model/529643 ... nder-3-max

Tensioner Tensioner Tensioner
X-axis Belt Tensioner https://amzn.to/3wULeRS
Y-axis Belt Tensioner (4040 for max) https://amzn.to/3LZPlAm
Ender 3 Max dual Z axis upgrade https://amzn.to/48S1sMi - its my understanding the neo already comes with this as the normal max did not. this was one of the most needed and useful upgrades iv done. realy solved the x axis sag! this upgrade requires you to move your PSU UNIT but i planned on having it outside of my enclosure anywho.

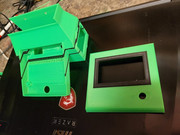
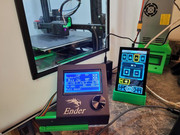
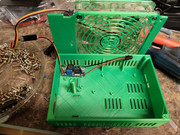
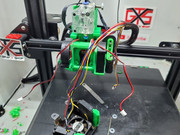
PSU UNIT and LCD Screen relocation options.... i mashed my own design together based on 3 or 4 other designs that i found. i dont know if i ever saved this stl or not . so since i mounted the motherboard on the other side of my enclosure .. so with the help of longer and extention cables. we can move the lcd screen any place we like
Rainbow Wire Flat Ribbon Cable 10 Pins 66cm Length https://amzn.to/3wSWKvY and option #2 10 Pins 148cm Length https://amzn.to/3PNyqE9 || you also see the short lived "Creality 3D Pad 5 Inch HD Display Screen " . it ... well it wasn't great. i stopped using it as fast as i started .

Motherboard relocation this required a remix of another file to fit a 12volt computer fan. and then a buck converter to convert the voltage from 24 volts to 12 .
STL FILE: https://www.printables.com/model/529629 ... 0mm-fan-co
2pcs DC-DC Buck Voltage Converters: - https://amzn.to/3a2GoZG (2 for $11)
12volt 120mm fan options - basic - https://amzn.to/3NYs98A
12volt 120mm fan options lighted - https://amzn.to/46OUxmd
don't want to use a voltage step down? USB Powered 120mm fan -https://amzn.to/3O2L4zU
cd card extention .
Creality 48CM TF to Micro SD TF Extension Cable https://amzn.to/3Gp3dmF
Extruder issues ! - it wasnt bad. but it wasnt great. and the mess that trying to print TPU made of this was not great. so upgrade.
in later weeks or months iv since started using the clear one here: Transparent Dual Drive Extruder - https://amzn.to/3pYGSsg
Dual Drive Extruder V2.0 DDB https://amzn.to/3wRuDgt
Dual Drive Extruder V2.0 DDB (half the price) https://amzn.to/3t1kVXT


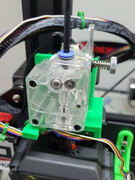
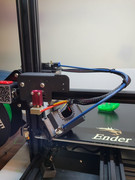
New Hotend and lets Direct drive convert at the same time!
again using my new fav extruders i designed a custom direct drive mount that centers the weight better (atleast i think so )
STL: https://www.printables.com/model/511217 ... nder-3-max
Haldis 3D Red Lizard V5 Pro V6 Hotend - https://amzn.to/3GvAsVw
Transparent Dual Drive Extruder - https://amzn.to/3pYGSsg
Dual Drive Extruder V2.0 DDB - https://amzn.to/3wRuDgt
Dual Drive Extruder V2.0 DDB (half the price) - https://amzn.to/3t1kVXT
Capricorn Premium XS Bowden Tubing 1M - https://amzn.to/3LUiPj9 (stock is too big)
Nema17 Stepper Motor - https://amzn.to/3t0QP6K (these are the smaller ones as stock will not fit!)
(i used 25cm) Stepper Motor Extension Cable (25cm, 50cm, 75cm, 100cm) - https://amzn.to/3Bj99gB


I then got around to getting the PSU off my desk and out of the way.
so remixed a mount.
STL: https://www.printables.com/model/529571 ... mount-side
Left Angle 18 AWG Power Cord - https://amzn.to/3lOJIub
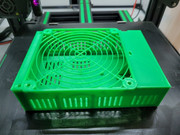
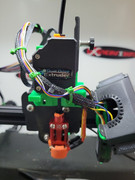
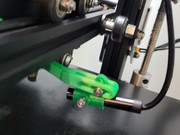
GXS_Satsana (remixed) DD Dual 5015 Fan Shroud for ender 3 max - for some reason i figured it be simple to rework a design of my own fan shroud. clearly i borrowed most of the design elements . but its a simple design and it works. but i did clearly rework a lot of it. but it basicly came down to reusing the best mount for 5015 fans more or less.
STL: https://www.printables.com/model/547782 ... oud-for-en
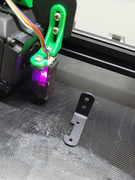
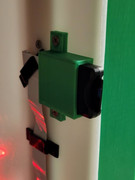
Mount for USB adxl345 accelerometer (trianglelab) https://s.click.aliexpress.com/e/_DmfZD5H
2x 5015 fans - (ender 3 max takes 24 volt version) https://amzn.to/3qnqeCL
1x 4010 Fan (24Vfor ender 3 max) - https://amzn.to/45mcQxD
Connector Wire Cable 100mm (XH2.54mm - https://amzn.to/456rIR1
3mm x 4.3mm Brass Injection Molding Knurled Threaded Insert Nut https://amzn.to/3qgDaKV
400Pcs Button Head Socket Cap M3 Screws Bolts - https://amzn.to/47rPTLq


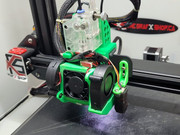
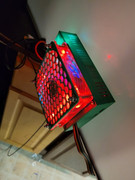
The Nozzle cam! - it gives a great view of first layers and prints.! and it makes for great youtube!
and it was made to bolt onto the GXS_satsana
Nozzle Cam - 5.0MP Endoscope, Adjustable LED Camera https://amzn.to/3IMYpdF

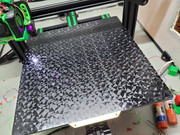
NEW PEI BUILD PLATE!- wish i did this sooner. lighter and it sticks better. no more glue stick for me!
PEO+Textured PEI Sheet 310x320 / Magnet - https://s.click.aliexpress.com/e/_DnNQTHH - Aliexp
PEO+Textured PEI Sheet 310x320 / Magnet - https://amzn.to/45VIge5 - Amazon

Klipper!
i installed klipper at first on my streaming computer. it worked ok but not wile streaming. so i got a Pi!
Raspberry Pi 4 Model B - https://amzn.to/45om3pC
Octoprint
im currently running octoprint with klipper.
OctoPrint - https://octoprint.org/ & Klipper firmware - https://www.klipper3d.org/
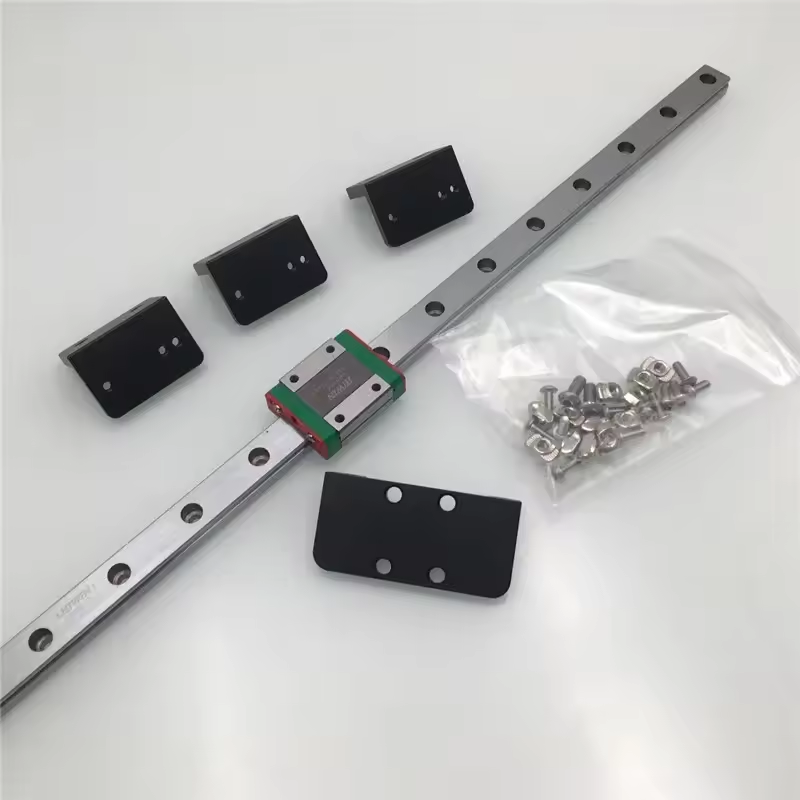
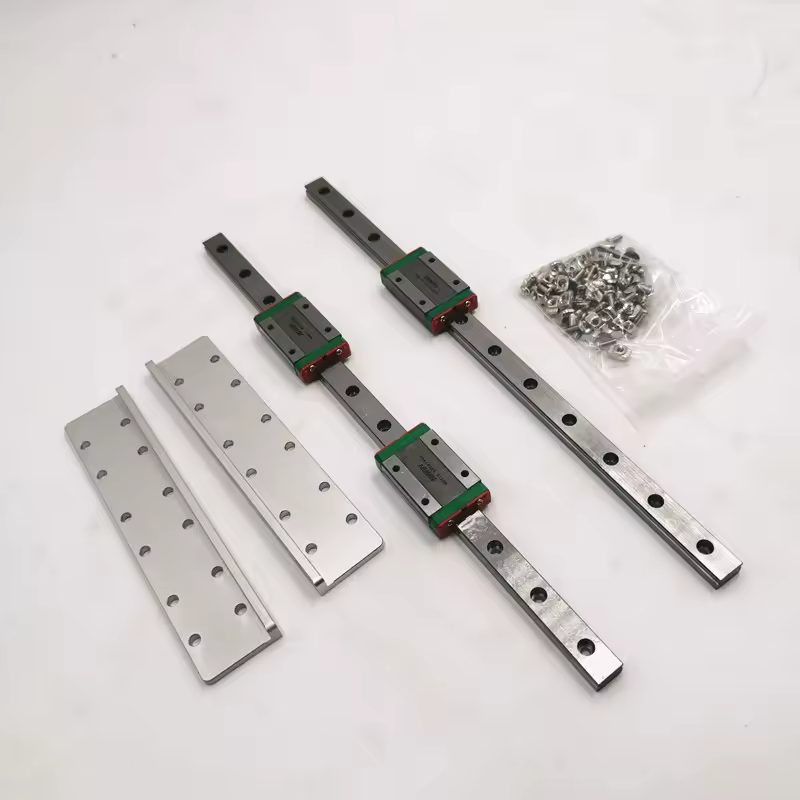
---as of right now i have installed linear rails on the y and x axis
im currently reworking my shroud design and endo mount-
Ender 3 max 3D printer Y axis Hiwin MGN12H linear rail upgrade kit - https://s.click.aliexpress.com/e/_c3KJKFyX
and
Ender3 max 3D printer X axis linear rail upgrade conversion kit Hiwin - https://s.click.aliexpress.com/e/_c3ob19Zp