
i had my printer for 2 weeks and started on this and finished it some time after i don't remember how long it took but over a year later and no issues
ill try to list as many products and links a possible, but i used what i already had on hand for 90% of it.

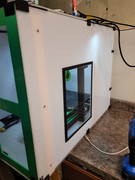


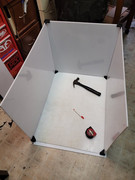
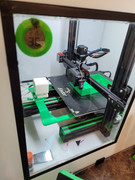
bottom is screwed to plywood / chip wood board. - it would of likely sat fine with no bottom for most printers. this being an ender 3 max. and i had a handle on the bed with camera mount. it needed a lot of extra space. no bottom or easy to remove all sides and top at once lifting it off the printer would of been great for all the times iv taken the printer apart since. i spray painted it black
the walls top and floor are made out of what iv always called "sign board" its got a name i don't recall it. but its basically what you'd see vinyl decals stuck to on a lighted sign backing. but its fairly strong and i had a sheet of it already - i think its basically this stuff? https://amzn.to/4aY3prJ

Doors - oh crap now I'm going to need doors
but i need to be able to see in . so this is what i came up with. 3d printer doors with glass in them. i just happen to have 4x 8x10 picture frame hanging out ! amazon does sell frames with plastic rather then glass. ill link that below in the list of links. my frames with glass came from the $ store that's better then amazon at $6 a frame. you could get all 4 for that ! but doors need to be printed in 6 parts. this allowed me to design a grove to slide the glass in then i plastic welded the door parts with a soildering iron - here is one that's perfect. the bigger and flat tips make is so much less work. https://amzn.to/41W4hZS


hinges - crap doors need hinges . and i was dead set on the door fitting with in the walls rather then just slapping some hinges on the sides and sending it. it was then i looked down and noticed an old TV stand that had glass doors with inset hinges . so i copied them to the best of my 3 weeks into 3d printer tinker cad skills could do for me.

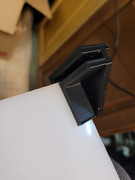
Corners and wall 3d printed parts - to hold everything as one i designed and printed some "hardware" to help connect the sides to the walls.

i then added a bit of a wood frame for extra support as i was going to stack all my rolls of filament on top of it so i wanted it to take the weight.

and then the box was built so i added a side window ( bigger old picture frame i took the glass from and 3d printed a frame then glued around it
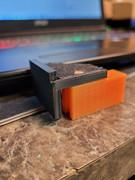
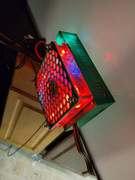
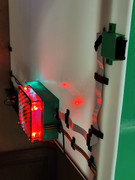
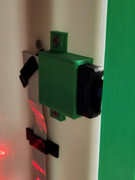
then the electronics need to be outside the box because heat bad for electronics!


Products used links
White Cast Acrylic (walls top /bottom)- https://amzn.to/4aY3prJ
8x10 Picture Frames with Plastic Panel - https://amzn.to/3NYYdKg
soldering iron / Wood Burning Kit https://amzn.to/41W4hZS
2pcs DC-DC Buck Voltage Converters: - https://amzn.to/3a2GoZG (2 for $11)
12volt 120mm fan options - basic - https://amzn.to/3NYs98A
12volt 120mm fan options lighted - https://amzn.to/46OUxmd
Don't want to use a voltage step down? USB Powered 120mm fan - https://amzn.to/3O2L4zU
Micro SD to (bigger) SD Card Extension Cable - https://amzn.to/3tJBXgS
Mini SD to Mini SD Card Extension Cable Adapter - https://amzn.to/3U2sVWP
12v LED Interior Light Bar with on/off switch (2 pack) also wired into my voltage converter . - https://amzn.to/3ShmZIc
12 Inch Light Strip Bar, Dimmable Plug in USB Light - https://amzn.to/3RVrhnk (easy option)
STL file links
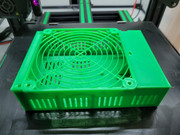
GXS - Ender 3 main board enclosure with 120mm fan cover - https://www.printables.com/model/529629 ... 0mm-fan-co
GXS Ender 3 MAX PSU Vertical Mount (side) - https://www.printables.com/model/529571 ... mount-side
GXS - Ender 3 PSU Vertical Mount (side)- https://www.printables.com/model/529599 ... mount-side
USB / SD / micro sd card holder (wall mount) -https://www.printables.com/model/572561 ... wall-mount
feel free to reply and request any extra info and or files . ill be in no rush to update some of this but if someone asks at least i know what to update first